The Ugly Brothers Barbeque
Fowl Recipes
Smoked Turkey
with smoked gravy |

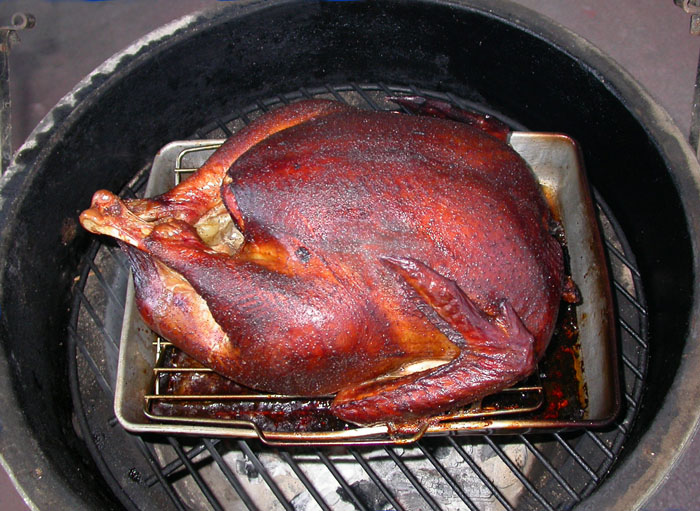
Smoking turkey is pretty easy, especially for those of us with a Big Green Egg. The BGE is heavily insulated so maintaining the heat is much easier than a metal smoker, especially in low ambient temperatures or windy conditions. We've known a few folks who have tried to smoke turkeys in thin walled metal smokers for Thanksgiving or Christmas when it's been very cold outside and found that the heat radiated out too fast in order to maintain a temperature adequate to cook the bird. The result being that the bird was finished in an oven..... If you've got a thin metal smoker and are planning to smoke a turkey for some special we recommend that you think about finding some way to insulate it to prevent such tragedy. Water heater insulation has been recommended to us but it is something we haven't tried ourselves (don't need to).
Doin' a turkey is no big deal so we don't have a fixed recipe but rather prep and season it depending on how we feel that day. We do not stuff the turkey we are smoking in order that it cook quicker and allow for the smoke to penetrate the cavity of the bird. In general it takes about four hours to smoke a 15 pound bird.
INGREDIENTS FOR THE BIRD
The Bird: A 15 pound fresh turkey (preferred) or one that has been thoroughly defrosted.
Brine: Truth is we've kinda gone off brining these days but still brine a little less than about half of the turkeys we smoke, just depends on our mood that day. If you do brine be sure to use plain salt (iodized salt imparts a kind of metallic taste) and rinse the bird out after brining. The salt from the brine will penetrate the meat and any remaining on the surface of the meat may make it taste too salty, especially if you add more seasoning. More info on brining on our Cures and Brines page
Injection Seasoning: Yes. A good thing, but we do not combine injection seasoning with a brine. When we are too lazy to mix up our own, we turn to Tony Chachere.
Outside Seasoning: If we don't mix up our own for the occasion we will generally use a combination of Tony Chachere's Creole Seasoning and John Henry's Pecan Rub.
Beer: Of coarse. We will pour a can of good quality room temperature beer in the bottom of the drip tray to create some beer steam during the process and mix with the drippings we will later turn into gravy.
Butter: Unsalted Sweet Butter, unmelted to rub on during the final stages of smoking.
INGREDIENTS FOR THE GRAVY
Turkey Parts: Use the neck and internal parts for making a stock
Onion: Coarse chopped for stock, chopped fine for gravy
Garlic: Coarse chopped for stock, chopped fine for gravy
Celery: Coarse chopped for stock.
Butter: To saute with.
Red Wine: For deglazing drip pan.
Gravy Thickener: Bisto (preferred) or flour & butter to make a roux.
COMBUSTIBLES
Charcoal: Hardwood. Hardwood lump charcoal, such as Big Green Egg or Barbeques Galore lump is best. This has no fillers such as most popular briquettes do, has more flavour and burns more efficiently, leaving less ash. Second choice would be Royal Oak hardwood briquettes.
Wood: First choice is fruit wood such as apple or orange, then pecan or hickory. We generally do not use mesquite because we feel it is too strong a flavor for birds. We don't use a lot of wood, maybe four or five chunks which have been soaked for at least a half hour. In fact, the hardwood charcoal we use gives it a lot of flavor so if you want a milder flavor, skip the wood.
HARDWARE
Digital Internal Meat Thermometer: Necessary. Use this rather than time or eyeballs to determine when your meat is ready. We use the type that will allow you to insert the probe into the thickest part of the breast and run the wire outside the smoker so you can monitor internal temperature without opening the smoker. We smoke our turkey to an internal temperature of 170˚ F.
Cheap Drip Tray: In an ideal world we would use an enameled cast iron tray but the smoke on the outside is just too much a hassle to clean up such a nice piece of hardware. We have a couple of cheap aluminum and enameled steel trays we use to catch the drippings and to protect the bird some from direct heat which may scorch the bottom of the bird. These are pretty much dedicated to smoking so we don't bother to scrape off the smoke stains on the outside, too much work... We tried covering then with aluminum foil to make cleanup easier but the truth is that the drippings will work their way under the foil so you end up with just as much clean up. Big tip: deglazing the drip pan with a little wine will make a superior gravy and will make clean up much easier.
Wire Rack: Holds the bird off the bottom of the drip pan so the bottom of the bird doesn't wallow in drippings and offers a bit more protection from scorching.
Basting Bulb: Allows you to suck the juices out of the cavity or drip tray and use them for basting.
TECHNIQUE
STARTING OFF
When you are seasoning and preparing the bird use the neck and other turkey parts to make a stock. Saute coarse chopped onion and celery with butter until they begin to go limp then add garlic, the neck & parts and lightly brown. Add water, bring to a boil then reduce to a simmer. Allow it to simmer while you are smoking the bird, adding more water as needed to keep the parts covered in water. When finished strain the parts and discard so you are left with liquid stock only.
Start some hardwood lump charcoal in a charcoal chimney, about half a chimney full, and make sure all the coals have ignited before use. Too much charcoal can make your fire too hot. Of coarse, if you're using a non-insulated smoker you may want to use the whole chimney full since you're gonna lose a lot of the heat. While the coals in the chimney are catching select large hunks of the hardwood charcoal for the smoker. We like to put the larger hunks on the bottom and minimize the really small pieces, our feeling is that small pieces of charcoal will prevent air circulation and could choke out the fire. We put about four to five inches of charcoal in the bottom of the BGE and evenly distribute the burning coals from the chimney over the top of these. Our philosophy here is that by placing them on top they will burn down at a slower more controllable rate than if the hot coals were on the bottom and burning up.
GETTING INTO IT
The hot coals are added to the BGE about 20 minutes before we want to start the bird. We adjust the dampers to get the BGE temperature up to about 400˚ F then throw on the damp wood chunks just before the bird goes on. After about twenty minutes at 400 degrees we close down the dampers to bring the temperature down. Our goal is to get the temperature down to about 300-325 at the half hour to forty minute mark. After that we crack a cold one and let the BGE do the rest of the work for us. At about the hour and a half mark we insert the digital internal meat thermometer into the thickest part of the breast so we can periodically monitor progress without having to open the lid too often. In this manner you do not have to let go of your beer and run the risk of knocking it over or having it sniped by someone else. However, periodically during the process you may be required to hand off your beer in order to open the lid and baste the bird. Our recommendation is that you finish your beer rather than hand it off and that you don't bother basting before the bird reaches an internal temperature of about 150 degrees. Add more beer to the drip pan if needed to keep the drippings from getting too scorched. If the drippings get too burnt then forget about deglazing the pan for the gravy, it'll come out tasting burnt rather than smoked. When the internal temperature reaches about 160 we rub the skin with butter, no need to melt it as it will melt as you rub the butter on.
FINISHING
When the internal temp of the bird reaches 170˚ F we take it out of the smoker, wrap it in foil and allow it to rest while we make the gravy. To deglaze the pan and make the gravy we pour off most of the grease and add a small amount of red wine to the drip pan and put it directly on the stove top over a medium-low flame. As the wine heats up we scrape the bottom of the pan with a wooden scraper or spoon to loosen up the bits stuck to the bottom, adding small amounts of more wine (not too much or it will be too powerful) or water as need be. After the bits are loosened and before it thickens too much add back a small amount of the reserved drippings, turn up the heat, add some finely chopped onions and saute them until they begin to caramelize. At that point add some finely chopped garlic and saute for a few minutes before adding the poultry or vegetable stock, heat it for a while then pour it into a sauce pan, add more stock and bring to a boil then reduce to a simmer. Mix about a tablespoon (or two) of Bisto with cold water or milk and smooth out the lumps before adding to the gravy. If you can't find any Bisto and need to make a roux then melt about two tablespoons of butter in a saucepan, add two tablespoons of flour and cook over a low-medium heat into it begins to darken before adding to the gravy. Adjust thickness as desired by adding more thickener or stock as needed.
So that's about it, the only thing left to do is enjoy. If for some reason you end up with leftovers, the carcass and scraps are best utilized to make a killer gumbo.
This is kind of a fun treatment for chicken and one that gets some pretty good results. It works well in the Big Green Egg, a cylindrical smoker or a Weber kettle. If you're using a Weber kettle just be careful to spread the coals off to the side so you don't scorch things. You will need:
- A chicken.
- One of those racks for holding the beer can in the bird (such as the Bayou Classic ChickCan holder).
- A warm can of beer (use good beer).
- Seasonings.
- Orange or apple wood chips.
- Pie pan or something similar.
It's pretty simple.... Season your bird (we like a combination of Tony Chachere's and John Henry's Pecan Rub). Pour half of your beer into the pan that will hold your fowl then place the half full can (we're optimists) into the rack. Place the chicken on the rack over the can then stuff a small potato into the neck. As the beer begins to stream the spud will keep much of the moisture in the chicken's cavity. The beer in the pie pan will also add some moisture and act as a barrier to protect the bird from direct heat.
With the Big Green Egg we like to get the temperature up to about 275˚ F knowing that the BGE's great insulation will keep most of the heat in. With thin walled metal smokers or grills we prefer to get the temperature up to about 350˚ knowing that a lot of the heat will radiate out and be lost.
Cooking time will be about 1-1/2 hours but trust your meat thermometer to be the final judge. Cook it to an internal temperature of 175˚ F then take it out of the smoke, wrap it in foil and let it stand at least 10 minutes before cuttin' up. Your internal temperature will continue to rise some as the fowl rests.
We really prefer to use fruit woods for smoking these things though pecan wood works really well also. During the last 20 minutes or so it sometimes works well to cover the bird with a glaze. When we're lazy we'll just brush on some orange juice concentrate.
 Sounds pretty disgusting doesn't it? Well if ya haven't tried it, this is THE BEST way to do a turkey. Everyone the Ugly Brothers have fried a turkey for have been skeptical (to be polite) about the concept. Afterwards the verdict has been unanimous.... all have agreed that it is the BEST TURKEY they have ever tried. Sounds pretty disgusting doesn't it? Well if ya haven't tried it, this is THE BEST way to do a turkey. Everyone the Ugly Brothers have fried a turkey for have been skeptical (to be polite) about the concept. Afterwards the verdict has been unanimous.... all have agreed that it is the BEST TURKEY they have ever tried.
| Amount |
Ingredient |
Preparation Method |
| 12 lb |
whole turkey |
fresh, unstuffed |
| ~ 4 gallons |
peanut oil |
|
| lots of |
Tony Chachere's Creole Seasoning |
|
| lots of |
injecting marinate |
|
SAFETY EQUIPMENT: 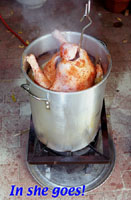
- Heavy duty gloves with long forearms, (welders gloves are good)
- Face Sheila or safety glasses
- Chemical fire extinguisher (non-water based) or a bucket of sand
Safety tips to remember:
- A 24 quart boiling pot (the most popular size) will overflow if the turkey is much larger than 13 pounds. Be sure your pot is large enough to contain expansion of the hot oil at least 6 inches above the level of the immersed turkey.
- Test for volume of oil required the day before you fry.
- Hot oil & water DO NOT MIX - be sure your turkey is dry before you try it lower it in hot oil. The resulting splatter from a wet turkey can be very dangerous.
- Keep small children and pets away from the hot oil. Someone may like the turkey so much that they may wonder what fried poodle tastes like, or worse.....
- Before immersing the turkey turn the flame OFF. This can help prevent a dangerous flare up if the pot overflows. Re-light the fire after the turkey is completely immersed
- The oil will remain dangerously hot for hours after the bird has been fried.
 About oil fires: About oil fires:
The leading cause of restaurant fires is water being added to hot oil in deep fryers. The water, being heavier than oil, sinks quickly to the bottom and nearly immediately boils and turns to steam. The hot steam rapidly expands and forces itself back up through the hot oil creating a volcano of splatter. This oil being thrown from the fryer often lands on nearby open flames from grills and other cookers and immediately ignites, spreading the flame across all areas covered by the splattered oil. Spraying water to stop the fire only spreads out the oil, and thus spreads the fire across a larger area.
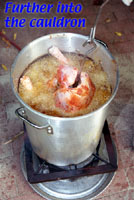
It is for this reason you must be sure your turkey has NO excess water or liquid in its surface or in the cavity and the flame on the turkey fryer should be TURNED OFF prior to immersing the bird. Water on or in the turkey can cause oil splatter which can ignite and scorch the poor sod lowering the turkey into the oil. Moisture in the skin of the turkey will create much the same sort of reaction, though on a smaller scale. When your turkey (remember, surface and cavity dried) is SLOWLY lowered into the HOT OIL, the moisture remaining in the skin will cause the oil to boil up about two inches higher. This is a normal reaction and poses no problems providing that the boiling pot is big enough to handle that expansion (the Ugly Brothers always allow a minimum of six inches for expansion), and that other safety precautions have been taken.
Here's the hardware you will need:
- A boiling pot (24 quart is the most common size and is sufficient for a 13lb bird)
- A high output propane burner (135,000 BTU)
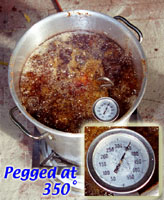
- A long stemmed (12 inch) cooking thermometer
- Marinate injector (see injectors on our Grillosphy page)
- Heavy duty gloves with long forearms
Setup:
You will want to put a drip pan under the fryer, large disposable aluminum trays or platters work well. Frying turkeys on a wood deck is not a good idea. High heat can scorch the deck and any oil spilled or splattered will stain it. If you are frying on a nice concrete deck you may want to spread a thin layer of sand several feet around the fryer to absorb spilled or splattered oil.
Now, Here's what you do:
The day before you fry your turkey you need to find out what volume of oil is required. To do this put your turkey on the lowering fixture and place it in the boiling pot. Pour in enough water to cover the turkey to within 1/2 inch of its highest point. Remove the turkey and mark the water line., this is the level of oil you will need. Pat the turkey dry and refrigerate.
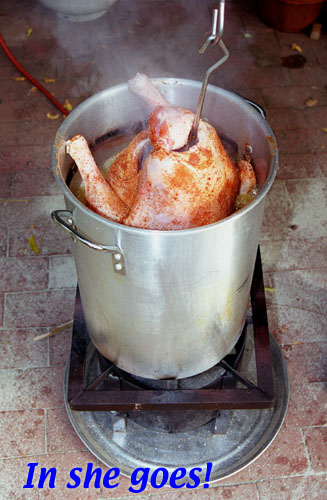
 When you are ready to begin, remove the turkey from the refrigerator and allow it to stand at room temperature for about an hour. Fill your boiler to the level mark you made yesterday and crank up the fire. While the oil is coming to temperature make sure the inside and outside of the turkey are DRY. Inject your marinate into the breast and legs of the bird then liberally coat with Tony Chachere's Creole Seasoning. Again, make sure the surface of you turkey is DRY. When you are ready to begin, remove the turkey from the refrigerator and allow it to stand at room temperature for about an hour. Fill your boiler to the level mark you made yesterday and crank up the fire. While the oil is coming to temperature make sure the inside and outside of the turkey are DRY. Inject your marinate into the breast and legs of the bird then liberally coat with Tony Chachere's Creole Seasoning. Again, make sure the surface of you turkey is DRY.
Most people will immerse their turkey in the boiling oil when it reaches 350 F, The Ugly Brothers prefer to get the oil temperature to 375 F since it will cool down to 350 when the bird is lowered into the oil. Be sure to turn the burner OFF when lowering the turkey into the hot oil, a dangerous flare up can occur if the oil overflows. This is often a problem for those who don't take the time to, or don't properly determine the volume of oil required and over fill the pot.
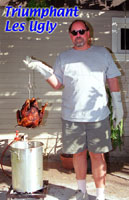
The rule is to fry the bird at 350 F for 3-1/2 minutes per pound. A 13 pound turkey will cook in approximately 45 minutes. Enjoy the best turkey you've ever had, and hey, while you've got all that hot oil why not make some of the Ugly Brothers Hushpuppies? Bon appetite!
Additional information and injecting marinate recipes can be found at The Cajun Shoppe, Lake Charles, Louisiana.
|


